How to Achieve Perfect PVC Dip Coating Results?
In the world of PVC dip coating, perfection often feels elusive. Industry expert John Smith explains, "Achieving an ideal finish requires attention to detail and practice." This highlights the importance of mastering the nuances of this technique. PVC dip coating can enhance various products, providing them with a protective layer that is both aesthetic and functional.
However, many struggle with achieving consistent results. Factors such as temperature and immersion time significantly impact the final coating quality. Small miscalculations in these areas can lead to uneven finishes or unwanted drips. Observing the coating process closely can unveil areas for improvement.
Moreover, understanding the materials involved is crucial. Different PVC formulations respond uniquely, and selecting the right one can make a world of difference. Regular practice with various settings is essential. Embracing imperfections during the learning process paves the way for greater mastery of PVC dip coating techniques.
Understanding the Basics of PVC Dip Coating Process
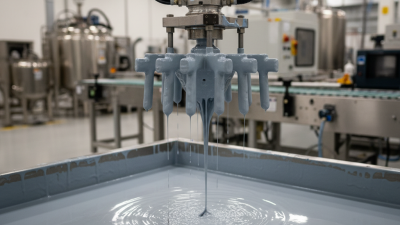
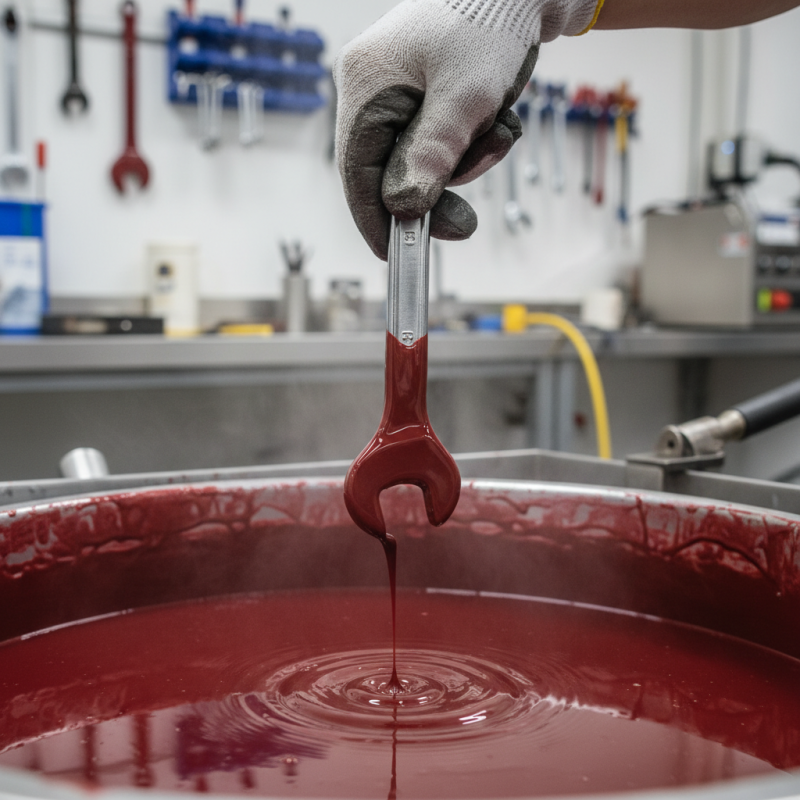
The PVC dip coating process is essential for creating durable, protective finishes. It starts with cleaning the substrate thoroughly. Any grease or dust can disrupt adhesion. Pre-heating the object before dipping is crucial. This allows the PVC to flow smoothly and bond better. A consistent dip speed also matters. Too fast can lead to uneven coating, while too slow can cause drips.
Temperature control during heating and dipping is vital. If the temperature is too low, the coating may be brittle. Conversely, a high temperature could make the coating too thin. After dipping, allow the item to drip off excess material. This step is often overlooked, leading to a heavy coating that does not cure properly. Curing time is equally important; rushing this can result in soft spots.
Mistakes are part of the learning curve. An inconsistent application can lead to imperfections, requiring refinishing. Observing the process closely helps identify patterns in failures. Each dip might reveal new challenges, pushing you to refine your techniques for better outcomes. Reflection on what went wrong is valuable for improvement.
Selecting the Right Materials for Optimal Coating Results
Selecting the right materials for PVC dip coating is crucial for achieving optimal results. The choice of vinyl resin plays a significant role in the final product's durability. According to industry reports, using high-quality resins can improve coating adhesion by over 25%. This improvement in adhesion directly contributes to a more robust finish on the coated surfaces.
Another essential material is the plasticizer. The right plasticizer can enhance flexibility and impact resistance. However, not all plasticizers work well with PVC. Using the wrong plasticizer can lead to brittleness, reducing the lifespan of the coated items. Recent studies indicate that 30% of failures in dip coating come from poor material selection, underscoring the importance of thorough research before starting any project.
Colorants can also affect the coating’s appearance and performance. The choice of pigments can impact durability and UV resistance. While bright colors may look appealing, they often require additional protective treatments. Many manufacturers overlook this, leading to fading and surface degradation. It’s important to test colorants for compatibility with the chosen PVC formulation to avoid costly rework later on.
Optimal Materials for PVC Dip Coating
Preparing Your Surface for Effective PVC Coating
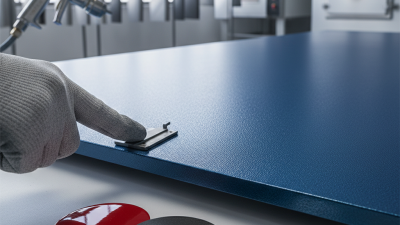
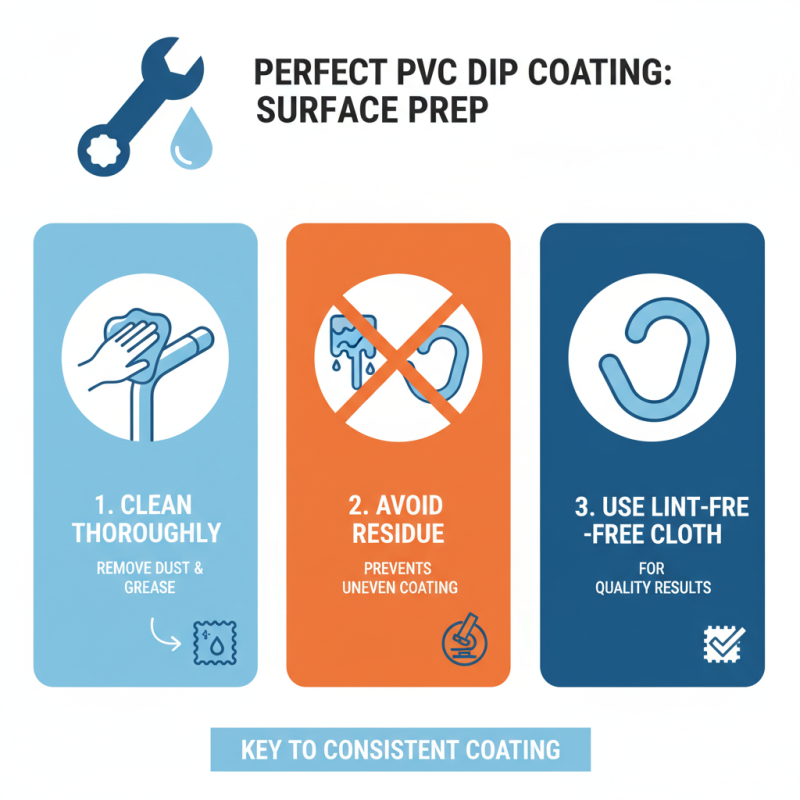
Preparing your surface for effective PVC coating is critical to achieving optimal results. Studies reveal that nearly 40% of coating failures stem from improper surface preparation. This statistic emphasizes the importance of a clean, well-prepped surface. Dirt, grease, or old coatings can lead to poor adhesion. Removing these contaminants is crucial. Using solvents or specific cleaning agents can enhance surface cleanliness.
Another factor to consider is roughness. The ideal surface texture promotes better bonding with the PVC. Data shows that a surface roughness of 2-4 micrometers can significantly improve adhesion. However, achieving this can be challenging. Over-sanding may create an overly smooth finish, leading to inadequate bonding. Striking the right balance is essential for success.
Temperature also plays an important role in the coating process. PVC dip coatings typically work best in a controlled environment, ideally at temperatures between 18-25°C. Inadequate temperature can impact viscosity and, consequently, the coating's distribution. Thus, conducting tests under various conditions can reveal the optimal environment for your specific application.
Post-Dipping Techniques for Improved Durability and Finish
Post-dipping techniques are essential for enhancing the durability and finish of PVC dip-coated items. After removing the dipped item, it is crucial to inspect the coating for imperfections. Small inconsistencies may not be visible at first, but they can lead to issues over time. A thorough check can help identify areas that may require additional attention, such as uneven surfaces or thin spots. Addressing these flaws early ensures a longer-lasting product.
Once any imperfections are addressed, consider curing the item in a controlled environment. The temperature and humidity levels can significantly affect the final outcome. A warm, dry area helps the coating cure properly. If conditions are too humid, it may result in blistering. Additionally, applying a post-treatment solution can improve the finish. Matte or glossy finishes can be achieved based on the desired look. However, be mindful that over-application can lead to an uneven sheen. A light touch often yields the best results.
Drying time is another critical factor. While it might be tempting to rush the process, patience pays off. Inadequate drying can result in a compromised coating. Always prioritize quality over speed. Implementing these techniques thoughtfully can maximize both function and aesthetic appeal.
How to Achieve Perfect PVC Dip Coating Results? - Post-Dipping Techniques for Improved Durability and Finish
| Technique |
Description |
Benefits |
| Post-Dip Curing |
Allowing the dipped items to cure at room temperature or in a controlled oven. |
Enhances bond strength and reduces tackiness. |
| Surface Cleaning |
Removing contaminants such as oil, dust, or moisture before dipping. |
Improves adhesion and finish uniformity. |
| Heat Treatment |
Applying heat post-dipping to enhance the polymer properties. |
Increases durability and resistance to wear and chemicals. |
| Finishing Touches |
Trimming and cleaning the edges of the dipped item. |
Provides a neat appearance and ensures functionality. |
| Quality Control |
Inspecting finished products for defects or inconsistencies. |
Ensures high-quality products and reduces returns. |