How to Choose and Apply Epoxy Paint for Your Next Project?
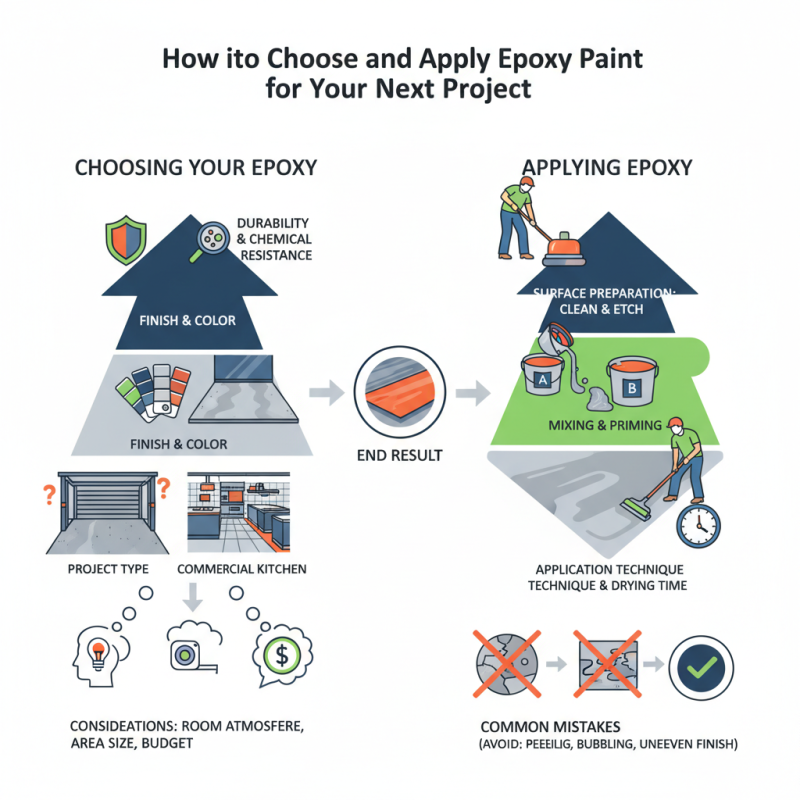
Choosing the right epoxy paint for your project can feel overwhelming. With so many options available, it’s easy to feel lost. Epoxy paint is known for its durability and glossy finish, but selecting the perfect type requires careful consideration.
When applying epoxy paint, factors like surface preparation and application techniques play a crucial role. Mistakes can happen, even for seasoned DIY enthusiasts. Improper mixing or inadequate priming can lead to peeling or an uneven finish. These issues are frustrating but can be avoided with attention to detail.
Visualizing the end result is vital. Consider the space you want to enhance with epoxy paint. Do you want a vibrant statement or a subtle look? Your choice can significantly impact the atmosphere of the room. Reflecting on these aspects will guide you in selecting the best epoxy paint for your project.
Understanding Epoxy Paint: Properties and Benefits
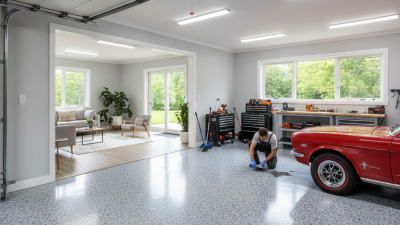
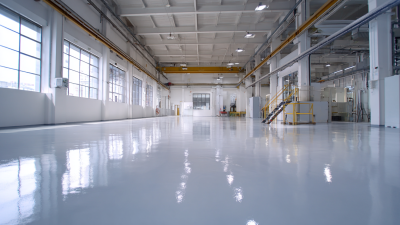
Epoxy paint is a versatile option for various projects. Its unique formulation gives it strong adhesion and durability. For instance, it can withstand harsh chemicals and heavy foot traffic. This makes it ideal for garages and industrial spaces. When applied correctly, the finish is glossy and smooth. However, achieving that perfect finish can be tricky.
Understanding its properties is crucial. Epoxy paint generally dries quickly, reducing the waiting time. Yet, this can be a double-edged sword. If you’re not careful, it can create a rush, leading to mistakes. Preparation is vital; the surface must be clean and free of contaminants. Improper prep work can lead to peeling or chipping over time.
Benefits go beyond just aesthetics. The thickness of epoxy creates a protective layer. This layer helps resist stains and wear. Still, one must remember that it’s more than just a pretty finish. Applying it improperly can result in a lack of durability. Experimentation might leave some areas uneven or discolored. Ultimately, the journey with epoxy paint requires patience and a careful hand.
Epoxy Paint Properties and Benefits Comparison
Selecting the Right Type of Epoxy Paint for Your Project
Choosing the right type of epoxy paint is crucial for a successful project. Epoxy comes in various formulations. Each type serves different needs. Consider the surface you will paint. Is it concrete, wood, or metal? You want to match the epoxy to the material.
Some epoxies are self-leveling. They work well on floors. Others are designed for vertical surfaces. It’s important to read the specifications carefully. Mixing ratios matter too. A wrong mix can lead to problems. This includes bubbling or uneven curing. Always follow instructions closely.
**Tip:** Test a small area first. This gives you a chance to see the color and finish. Coverage can vary widely by type. You might need more than you expect.
Another factor to consider is the environment. Some epoxies work better indoors. Others are ideal for outdoor use. Check the humidity and temperature recommendations. If conditions are off, your epoxy may not cure properly. This can lead to peeling paint.
**Tip:** Prepare your surfaces well. Clean and sand before applying. This simple step can prevent larger issues later. Your project deserves the best start.
Preparing Your Surface for Optimal Epoxy Paint Adhesion
Preparing your surface is crucial for optimal epoxy paint adhesion.
A properly prepped surface ensures the longevity and effectiveness of your application.
Start by cleaning the area thoroughly. Remove dust, grease, and previous coatings to prevent peeling.
Use a mild detergent and scrub well. Rinse and let it dry completely before proceeding.
During this process, inspect for imperfections. Holes or cracks can compromise the finish.
Fill them with a suitable filler and allow it to cure. Sand the area lightly to create a smooth, even surface.
This attention to detail enhances adhesion and final appearance.
Tips: Always wear protective gear while sanding and cleaning.
Ensure proper ventilation in your workspace. Test a small area first to check adhesion.
You may encounter unexpected issues, like stubborn stains. Be patient and persistent.
Embrace the imperfections that arise. They can lead to creative solutions and a better understanding of your project.
Applying Epoxy Paint: Tools and Techniques for Success
Applying epoxy paint can transform surfaces, but it requires the right tools and techniques. Start with a good-quality roller and brush. A foam roller often works best for smooth surfaces. Don’t forget to use painter’s tape. This helps prevent paint from getting onto areas you want to keep clean. A drop cloth is also essential to protect the floors.
Preparation is key. Ensure the surface is clean and dry. If needed, sand it lightly for better adhesion. Mixing the epoxy components requires attention. Follow instructions closely. If the mixture is off, it can lead to uneven curing. Applying the paint in a thin, even coat is crucial. Thick layers can become sticky and won’t cure properly. Consider using a paint sprayer for large projects. This method can save time but may take practice to master.
While applying, work in manageable sections. This approach helps avoid overlap marks. If bubbles form, don’t panic. You can pop them gently with a toothpick. Reflecting on the process is important. Some areas may require a second coat, so don't rush through it. Observe your work and adjust as necessary. Each project is a learning opportunity, so embrace imperfections and enhance your skills.
How to Choose and Apply Epoxy Paint for Your Next Project?
| Aspect |
Details |
| Surface Preparation |
Clean the surface thoroughly, removing any grease, oil, or dirt. Sanding may be needed for better adhesion. |
| Choosing the Right Epoxy |
Select epoxy paint based on your project's specific needs (e.g., high durability for floors, flexibility for walls). |
| Tools Required |
Roller, brush, mixing stick, bucket for mixing, and safety equipment such as gloves and masks. |
| Application Technique |
Apply using a roller for large areas and a brush for edges and corners. Ensure even coverage. |
| Curing Time |
Allow sufficient curing time as per the manufacturer's instructions, typically 24-72 hours before heavy foot traffic. |
| Maintenance |
Keep the surface clean using mild detergents; avoid harsh chemicals to prolong the lifespan of the epoxy paint. |
Curing and Maintaining Epoxy Paint for Long-Lasting Durability
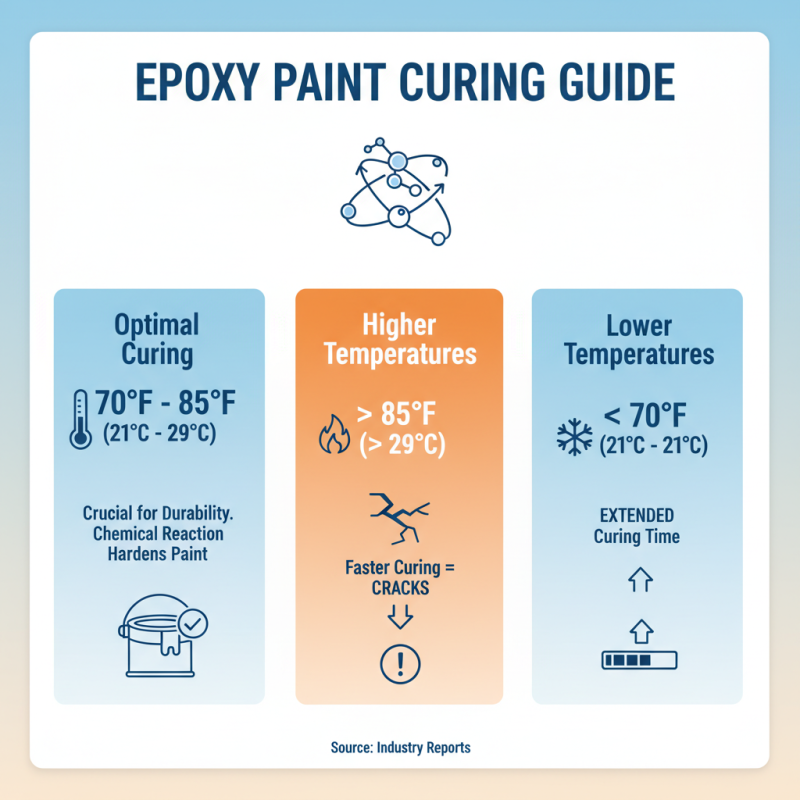
Curing epoxy paint properly is crucial for its durability. The curing process involves a chemical reaction that hardens the paint. According to industry reports, an ideal curing temperature is between 70°F and 85°F (21°C to 29°C). Higher temperatures may result in faster curing, which can lead to cracks. Conversely, lower temperatures can extend the curing time significantly.
Maintaining epoxy paint requires regular inspection. Look for signs of wear, such as peeling or discoloration. The National Institute of Standards and Technology advises that routine cleaning can extend the life of epoxy coatings. Simple methods include using a soft brush and mild detergent. After heavy use, consider reapplying a topcoat. Yet, be careful. Too much product can lead to uneven surfaces.
With time, even the best-applied epoxy can show flaws. Some areas may chip or become dull. It's essential to address these spots promptly. Ignoring them may lead to further damage. Regular maintenance can mitigate these issues and keep your surfaces looking fresh.